Live Operation : Common Features
5/27/2015 10:43:19 AM
Live Operation: Common Features
User Guide
This is a
user guide on the common features of Live Operation,
a
targeting-based operation solution.
ver 1.0
※ Deep Link: Tutorial
1. What is
Deep Link?
When clicking a push notification or
notification popup, the Live Operation Deep Link will: - take
you to a specific webpage;
- take
you to a specific section of an app.
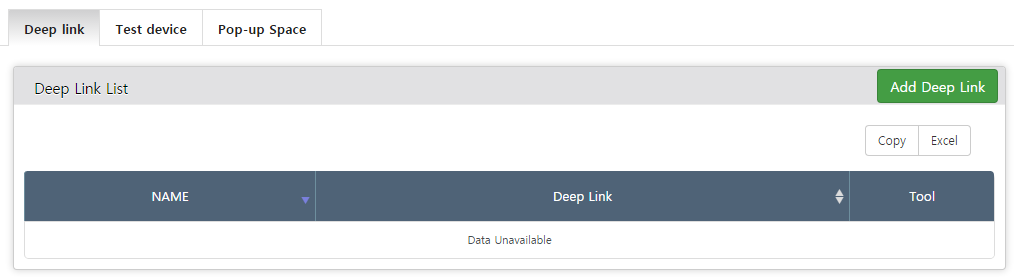
1-3. To use Deep Link, you should click
the Deep Link setting, or
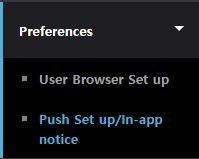
Go to Preferences > Push Set-up/In-app notice and move to the Deep Link tab.
1-4. Click the 'Add Deep Link' button in the Deep Link tab.
When Deep
Link is successfully added, the list appears in the table below and can then be
edited or deleted.
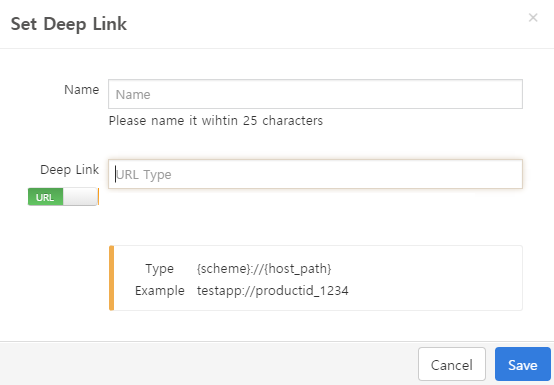
1-5. URL
Type and JSON Type are available for Deep Link. Choose the appropriate setting
according to the guide.
※ Create User Group
For Live
Operation, you can create and designate a user group to target.
Messages
can be delivered to the selected user group through push notifications and
notification popups.
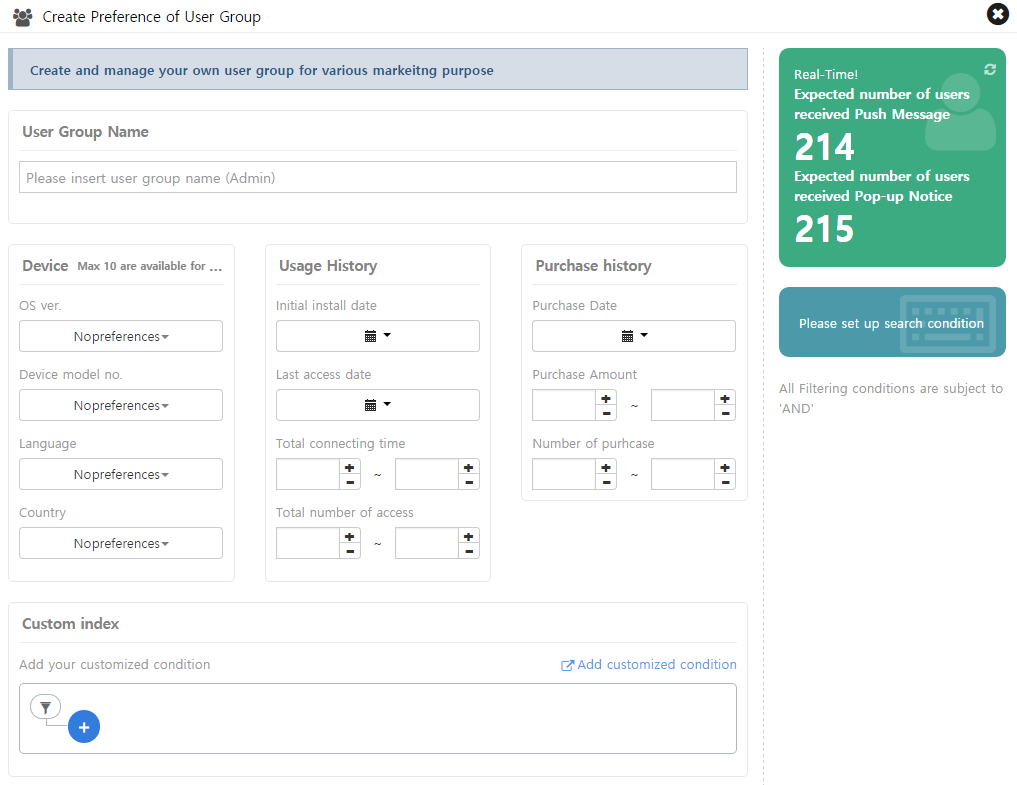
- OS version: Shows
the list of users' OS versions for the selected app.
- Device model:
Displays the list of device models of the users of the selected app.
- Language/Country:
Displays the language/country information of users of the selected app.
- First Installation
Date: Extracts users who installed the app for the first time during the
selected period.
- Recent Execution Date:
Extracts users whose last login date falls under the selected period.
- Total Execution
Time: Extracts users according to total login time.
- Total Number of Execution:
Extracts users according to number of times executed.
- Purchase date:
Extracts users who bought the IAP during the selected period.
- Purchase amount:
Extracts users according to the total sum of purchases.
- Number of purchase:
Extracts users according to the total number of purchases made.
- Customization:
Customize your targeting option by level, stage, region, etc.
Numbers, text strings, true/false
option are supported. Sequencing is not supported. : Adds the customized item integrated to the SDK.
※ User Group List
Created user groups can be verified from the user group list. Push notifications can be sent or
notification
popups can be displayed for the selected user group.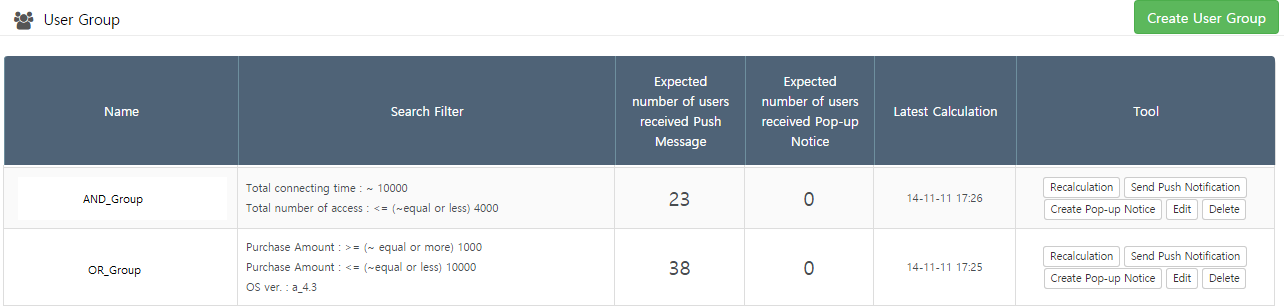
- Recalculation :
Recalculates the number of users for a particular user group at the
corresponding point.
- Send Push Notification :
Sends out push notifications to the selected user group. Selecting this
will bring up a page to compile push notifications.
- Create Pop-up notice :
Displays notification popups to the selected user group. Selecting this
will bring up a page to compile notification popups.
- Edit :
Edits the search conditions for the selected user group.
- Delete :
Deletes the selected user group.
 :
Creates a new user group. Selecting this takes users to the Create User
Group page.
:
Creates a new user group. Selecting this takes users to the Create User
Group page.
※ User Browser
Feature
On this
page, you can verify a set of user data within the selected user group, view
details such as user ID, push notification availability, OS, etc., and add more
data items of your choice.
1-1. Go to Live Operation > User Browser to verify user data
corresponding to the selected user group.
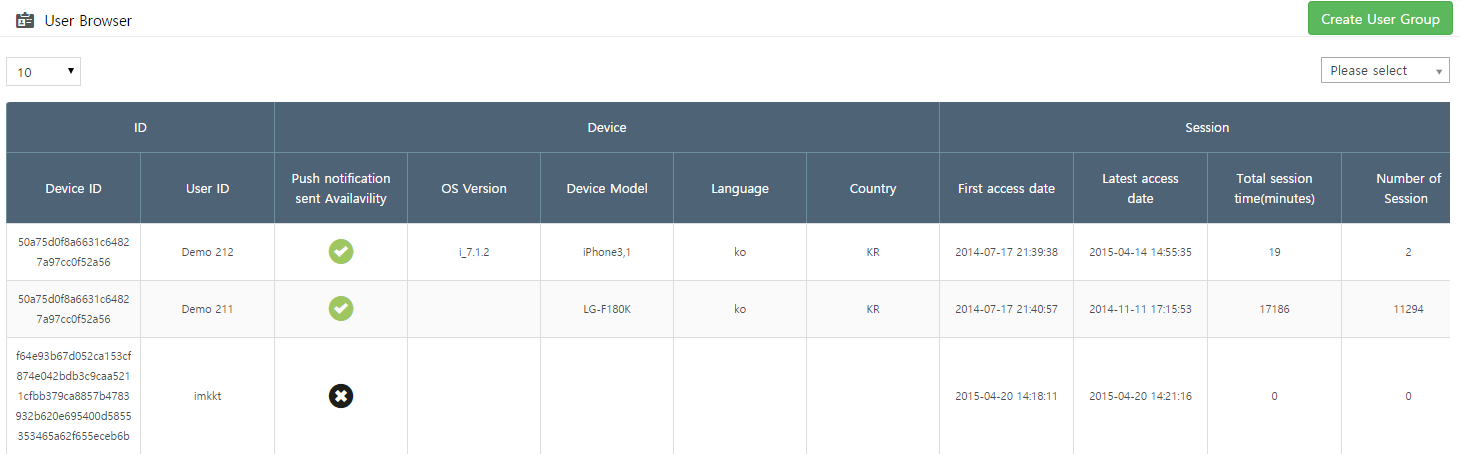
 : A
search can be performed for a created user group. After the search, the
users list for the selected user group will be displayed on a table.
: A
search can be performed for a created user group. After the search, the
users list for the selected user group will be displayed on a table.
- :
Creates a new user group. Selecting this takes users to the Create User
Group page.
1-2. Go to Prefereces >User Browser
Setup page and add the parameter value
to check from the user browser.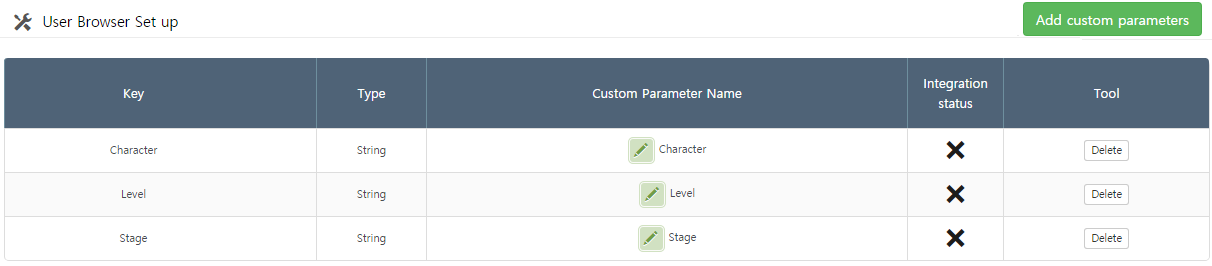
- Key: Verifies the
key value to associate with SDK.
- Type: Verifies the
created parameter type.
- Custom
Parameter Name : Register the name of the established parameter. Click the
 button to enter.
- Integration Status:
Verifies the integration status of the selected key value. Only key values
with verified integration will be available.
- Delete :
Deletes a selected parameter.
1-3. Click on the button to add a custom
parameter.
Clicking
the  button
brings up the Custom Parameter Setting popup. Enter each section accordingly
and save it.
button
brings up the Custom Parameter Setting popup. Enter each section accordingly
and save it.

- Type: There are 4
supported types - String, Boolean, Date, and Number.
- Key: Enter the key
value to use when integrating the SDK. Enter the English characters and
numbers without spaces.
- Name (Option):
Enter the name of a parameter to use for admin.
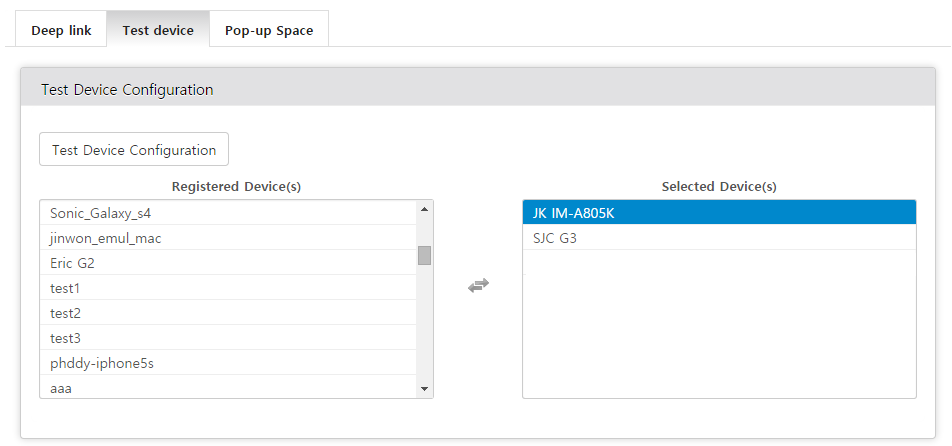
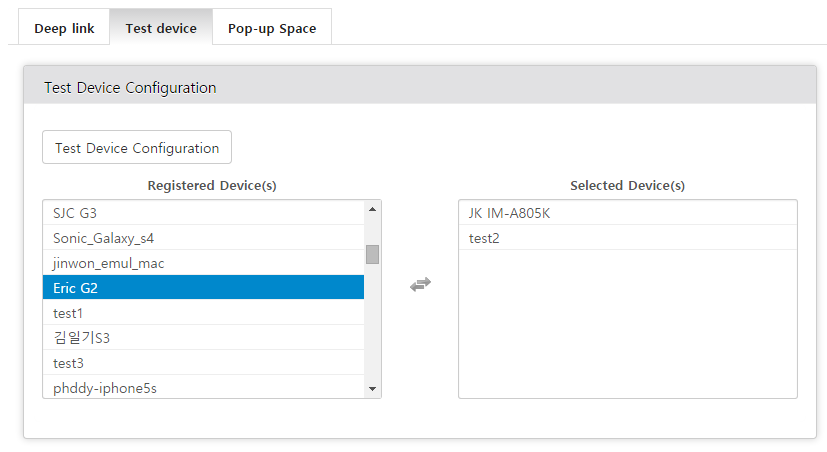
※ Add Test Device
Register
and set a test device and use it to send/register test push notifications and
notification popups.
Test
messages are visible only on registered devices.
1-1.
Go to Preferences > Push Set-up/In-app notice > Test Device tab to
register your test device.
To register a test device, click the 'Test Device' button to open the registration window.
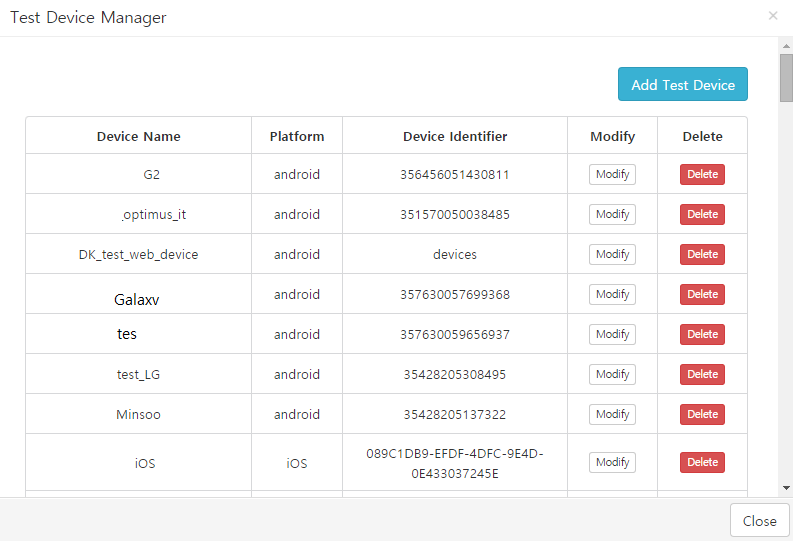
1-2. Verify the name, platform and
device ID information of the registered test device from the test device
management window.
Click the  button and register your new test device.
1-3. Enter and save the platform, name,
and device ID to register the new test device.
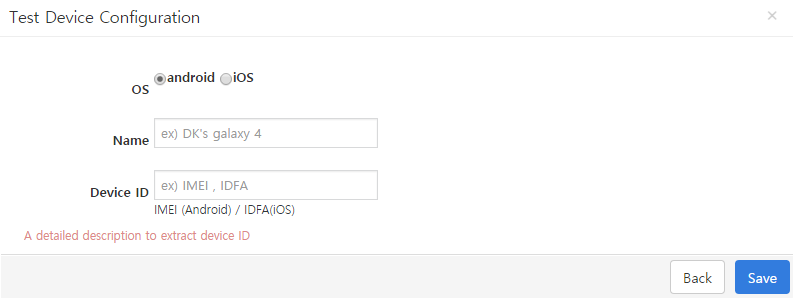
- OS: Select an
OS to register for the device.
- Name: Enter the
name of the test device to be used for the admin.
- Device ID: Register
an IMEI value for Android and an IDFA value for iOS.
1-4. Click
the registered test device to move it to the pre-set device category and the
device will now be available for tests.